


I had to learn to make these long, HD zippers but that effort was
worth it in the end. And, it's easy!
Text, photos and video by Tom Hintz
Posted – 7-6-2020
When I started making my FlyingRC.net Wing Bags and Protectors, the first problem was needing zippers in lengths of which traditional sewing suppliers had no concept. Many of my wing bags are designed for giant scale RC planes and need zippers between 60” and 100-inches in length, several longer yet. Finding ready-made, heavy-duty, metal zippers in these lengths turned out to be wasted effort.
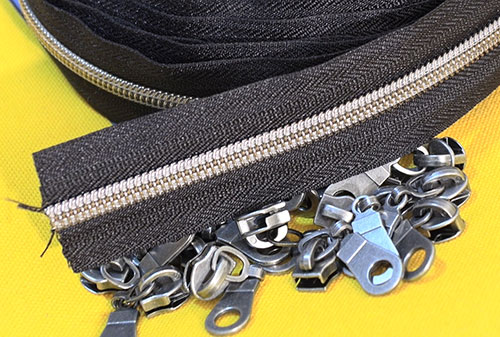
It was becoming clear that unless I wanted to alter my wing bag designs to fit commercially available zippers, I needed to figure out how to make zippers to fit my wing bags myself. I settled on using metal-toothed #5 zippers exclusively because of their durability and reliable operation. Another benefit was being able to buy this #5 zipper material in 10-yard-long lengths, complete with a bag of zipper pulls.
The bulk zipper I use comes with roughly ¾”-wide tape on either side, used for sewing the zipper in place. My FlyingRC.net Protector Sets need to have the zipper halves attached to fabric strips to give the bag depth, controlled by the width of those strips.
I used to iron a ¼”-wide edge over to the hidden side of each strip to prevent fraying after the installation is complete. I recently invested in a Janome AirThread 2000D serger and found that its superior performance and ease of use allows me to serge each zipper half directly to the fabric strips, eliminating the iron-over step. I put the zipper half upside down, tape aligned with the edge of the strip and run them through the serger. My Janome AirThread 2000D serger allows me to lower the trimming knife down out of the way as I do not need to cut anything from this assembly. After serging I fold the fabric open and top stitch along the fold near the zipper teeth and the strips are ready to be assembled to the pulls. Simple, fast, and clean with plenty of strength.
Because my zippers never run all the way around my wing bags, a filler strip must be attached to the ends of the zipper assembly to complete the band around the edge of the front and back panels. This serger-based assembly process means the zipper strips come out the same width as when cut. That lets me cut my filler strips exactly twice the width of those strips making the cutting process faster.
People can be outright fearful of putting a zipper slider onto the zipper material. My early attempts at this necessary step were also frustrating. Quite by accident, while watching a “How It’s Made” segment I noticed a passing shot of a woman in a factory prepping a zipper for installation. She put the pull in a purpose-made fixture that left both hands free to slip the separated zipper halves into the pull and tug them out the back end. Poof! The zipper pull was instantly in place! Rather than try to duplicate the purpose-made fixture I dug out my small hobby vise that worked just as well.
I clamp the zipper pull in my vise upside down, the narrow “inny” end towards me. I mention this only because this inverted orientation is not intuitive but works perfectly. Nearly as important is to trim away any fraying on the ends of the zipper material makes it easier to insert the ends through the slider.
The most important part of threading the zipper halves through pull is to be sure they emerge from the other end evenly. I use two zipper pulls on my wing bags (one installed from each end) and found that if the ends come through the pull unevenly a bulge in the zipper opening occurs when the pulls are brought together. Not a big functional issue but frustrating if you do not notice the alignment issue until the project is finished. Getting the ends even as they exit the pull just takes a little practice.
I suspect that for many people who sew, installing a zipper is a procedure which has been refined over the years. For many of us who are newer to sewing, learning this skill ends an often-extended period of frustration and words unbecoming the sewing room. The good thing about sewing is that most skills can be learned with a little effort and are frequently practiced as zippers are part of many projects.
Have a comment on this How-To? – thintz@ctc.net?subject=Making LONG HD zippers
Back to the How-To’s List
All yesmensew.com written, photographic and drawn materials are property of and copyright by Tom Hintz and NewWoodworker.com LLC 2013-2020. Materials cannot be used in any way without the prior written permission of the owner.